Friday, May 25, 2012

Transplanting Tomatoes


It's still early to be planting tomatoes here as we're still getting frosts at night. Actually, we can get frosts pretty much any day of the year. After early June  though, it's a little less likely. We've established that I LOVE to plant things and I have a way to get a bit of an early start. Not a super early start. Just a couple of weeks.


First, start with a pretty established transplant. I like a fairly tall transplant. Dig a hole about 12 to 18 inches deep. Basically, the depth of the container and part way up the stem of the tomato. 


Remove lower leaves of the transplant close to the stem, leaving the top  2 to 3 leaves intact.


This is what the stem will look like after it's lower leaves are removed.


Cover root ball and stem area with the soil.


Place tomato cage over the transplant. Water tomato.


Place plastic "Season Starters" (also known as "Walls of Water") over the tomato cage. Fill the tubes with water. The sun warms the water through the plastic making the environment inside the tubes like a little Greenhouse for your plant.


The very last thing I do is cover the entire thing with "floating row covers". You can cover on nights that frosts are expected then uncover the next morning. I like to leave the cover on until either:
  1. the weather gets warm consistently, or
  2. The plant reaches the top of the "Season Starter"


The nice thing about "floating row covers" is they not only protect from frosts, but they are light enough to let sunlight and water through. It also keeps the plants a little warmer which helps plants grow faster. Where we live, I need all the help I can get! Oh, by the way, Look at what we woke up to this morning.


That's right. It's snow!

Tuesday, May 15, 2012

Direct Seeding 101

I've SLOWLY been getting things put into my garden. It's been spring for some time now, but, I've just finally gotten around to planting. Normally, I grow quite a few of my own seedlings inside on my windowsill. Space is pretty limited there and it just didn't get done for whatever reason. Maybe too much knitting or crocheting?
Anyway, I'm either buying transplants (I know a good nursery.....I work there) or direct seeding. I began with  lettuce, spinach & radishes. These were all direct seeded. Then, went in the cabbage transplants and part of the onion sets. These were all in before I thought to take photographs.
Tonight after work, I grabbed a glass of wine and my seeds and put in the following:


Swiss Chard- a variety called "Bright Lights" LOVE the colors in this variety.


Beets- a variety called "Cylindra". Never grew this variety before......They just looked interesting.


And "Oregon Sugar" Pea pods. Placed at the base of fencing to climb up.

The trick to direct seeding.....dig a narrow furrow the depth of the planting instructions on the back of the package.


Place seeds in the bottom of the furrow, spacing seeds as per package (spacing). This is not crucial.....you can always thin out seedlings later. Lightly pull soil over seeds to cover. CAREFULLY water soil over seedlings. That's it! EASY PEASY! Keep the soil moist and in about 7-14 days, you should see seedlings sprouting. So, grab yourself a glass of wine and get out in the garden and plant a few seeds!

Saturday, May 12, 2012

"Upcycled" Raised Garden Beds


Hubby and I decided a couple of years ago, that, if we were going to be successful at vegetable gardening.......we were going to need a plan. Our ground is pretty rocky. By that, I mean anything from pebbles to boulders the size of a Volkswagon Beetle. Raised beds seemed a good solution. Hubby had already terraced the hillside where we wanted the garden. We started looking around for materials we had on hand to build our first section of raised beds. We had quite a few 8x8x16 "Cinder" blocks so we stacked the blocks 2 high on three sides tying into the bank of the upper tier(where my raspberries were already planted). Then we began hauling in loads of sifted soil, compost and composted horse manure (with 4 horses, we have an abundance of this).


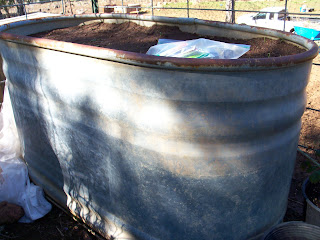
Then we hauled in an old galvanized stock tank and filled it with the soil mixture.


We fenced the entire "garden" area to keep the deer out. Then, we had to add bird netting around the fence to keep the CHICKENS out. Don't get me started about "free-ranging" chickens. It's been a pretty good garden. I plant strawberries, herbs and a few flowers in the "holes" of the Cinder blocks. I also CRAM the garden full of our favorite veggies. You've heard of French-intensive gardening? Ours is more of a "Hillbilly" intensive gardening system.


Wednesday, May 9, 2012

Yummy Yogurt

It's been about a week since my last post. I've been busy. Between work and Pinterest, I don't feel like I've gotten much done. I  have made a couple of batches of homemade yogurt, though. Yogurt 101 is the basics of making homemade yogurt (and a simple knit cozy for your quart jar).

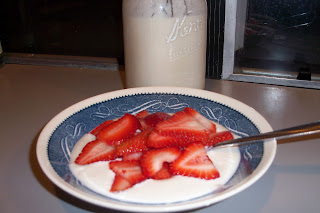
The first batch I made, I heated the milk on the stove like the instructions. It SEEMED to take forever to heat the milk (and keep from burning it). So-o-o-o-o-o, the second batch, I heated the milk in the MICROWAVE. If you heat in minute increments (checking the temperature after each minute), it seems to reduce the risk of over-heating. Plus, you minimize the risk of burning. After the yogurt has set up. I've been adding 1 teaspoon vanilla and 1/4 cup Splenda to the yogurt. Then you can add your favorite fruit.


If you'd like to give the yogurt as a gift, check out this cute way to dress up your gift (with cozy and recipe) from Simply Notable. In fact, I can think of several kitchen gifts that could be dressed up this way!