Sunday, April 29, 2012

Just Checkin' In

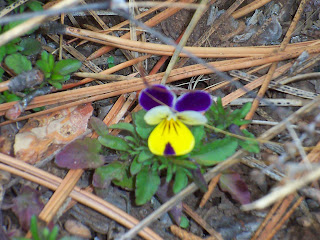
It's been a little over a week since I last posted. Well, I've been busy. On the sunshiny days (and I'm not at work), I've been outside. Getting stuff done. Pruning, weeding, planting, watering, fetilizing......You know, stuff. Enjoying the flowers as they start blooming. Here's a few for you to enjoy.
Viola
Crocus
Grape Hyacinth

Buttercup
Daffodil
Then, there's those rainy, snowy, hailing days. Inside stuff. Finished the posters I've been working on. Good thing too. The event is the first weekend in May. Finished the "Contest Afghan". Once I get it blocked and some DECENT pictures.....I'll share it with you. I've also found Pinterest. Actually, I had heard of Pinterest. I didn't think it was going to be of any interest to me. BOY,  WAS I WRONG! I ABSOLUTELY LOVE PINTEREST! I've found all kinds of FABULOUS ideas there! Also, when I find an article (or pattern, or recipe) on the internet....I just "Pin" it to my page. When I need to find it again, I just pull up the link. That's right, no more "now where did I find that?" FABULOUS! Stay tuned there will be more stuff coming (with links....so YOU can find it!).

Saturday, April 21, 2012

Planting an "Orchard"

When we first bought our property (in 2003), we decided we should plant some fruit trees. So we picked out a location and began planting. Of the 10 trees we planted, ONE apple tree is left. Deer seemed to be our biggest problem. If they didn't defoliate the tree, the bucks would rub their horns on the tree, stripping the bark off. Big problem for young trees!

We wanted to re-plant some more trees, so we decided fencing the area was the best solution. The fence will not be very tall, but the area inside the fence is fairly narrow,which seems to deter them from entering (at least it works for our garden). Thursday and Friday we began fencing and planting more bare root fruit trees.

We dug holes about a foot across and about 18 inches deep. Made a mound in the center of the hole and placed the roots over the mound.


Mixed some composted horse manure with the native soil and back-filled the planting hole. Making sure not to bury the trunk any deeper than where the roots emerge from the trunk.


With the toe of my boot, I GENTLY tamped in the soil around the base of the tree. This firms the soil around the roots and makes an indented area around the tree to hold water when watering.


We finished planting the trees on Thursday just before it began raining (AGAIN). So, we didn't water them in that day. Although normally we would.

I also decided we needed Rhubarb in our "orchard". Also, as a girl, I remebered picking asparagus in the pear orchards behind our house. I've always wondered if there was a reason they planted asparagus around the trees. Maybe some kind of companion planting? Anyway, I thought we should plant asparagus, too.


We won't be able to harvest either the asparagus or rhubarb for a couple of years. The roots need to gain energy before harvesting. We now have 2 more apple trees and 3 cherries, 2 rhubarb and 8 aspargus in our little "orchard". Now the watering, fertilizing, mulching and pruning begin!


Thursday, April 19, 2012

Weaving in Ends as you Go

I've been reading a lot of people sympathizing with other crocheters about all the ends they will have to be weaving in. This got me to thinking I should share my "Weaving in ends as you go" method. I'm a self-taught crocheter, so this method may be sort of unconventional. It works for me though. Maybe it will work for you too.

Catching the tail in your chain:


When chaining, place your tail yarn (pale gray) over your working yarn (dark gray). Yo with working yarn trapping the tail yarn between stitches. When you do this it moves your tail yarn up to the top of your work. Continue as normal around ring.

Weaving in Tail Yarn:

When you get back to your tail yarn. Using your crochet hook, pull the tail yarn through the back loop of your stitches around to any corner (I like to end at a corner because your next round of stitches will cover it).


Continue your next round treating the back loops (with tail woven through) as if it's one yarn. Your next round will lock that tail yarn in place.


After you've crocheted over the corner (with the tail yarn), cut yarn close to cover stitch. Continue this method every time you need to change colors.


You will get a little bit of a ridge on the back side of your work, but that's worth it to me if I don't have a gazillion ends to weave in at the end of my block!

Wednesday, April 18, 2012

More Blooms!


Three days off this week (only one last week). I have a whole line-up of outside things that need to get done. Unfortunately, it's raining and cool today. So, it's more inside stuff again today. Working on the posters. Baked an Apple spice cake. Got a few more rows knitted on the Contest afghan. Maybe I can complete the last 6-inch square Love and Honor. I did get outside (between showers) long enough to get a couple pictures of these Dutch Irises.


Aren't they dainty and cute? If I can remember, I should plant a few more bulbs this fall!

Friday, April 13, 2012

Day Off

Yesterday was my day off. It snowed and hailed. No going outside and working in the garden in the sunshine for me. Here's what I did (inside) instead. A little housecleaning. VERY little. Basically, just enough to say I did some. You know.....the basics.....dishes, put away laundry, clean the floors. Then, I blocked the square I just finished.


 It's called Drop in the Bucket.
I also completed one (of 4) of Love and Honor.


I had a bit of trouble figuring what was going on in round 6. This tutorial helped me A LOT!
Besides the crocheting, I also baked some of my hubby's favorite cookies.....Chocolate Chip. Completed 4 (of 13) posters for an event in May. I also knit a few more rows of the contest afghan that doesn't look like it will be making the finalist stage. Quite a bit done, I'd say. Maybe next week I'll get sunshine!

Thursday, April 12, 2012

SUPER EASY "Black Forest" Cake


SUPER EASY "Black Forest" Cake


1 Box Chocolate Cake Mix (and ingredients to make.....eggs, oil, water)
1 Large can Cherry Pie Filling

Prepare cake mix as directed. Pour into greased 9x13-inch Baking dish. Drop spoonfuls of cherry pie filling onto cake mix.


Bake at 350F for 30 to 40 minutes (or until knife inserted in center comes out clean). If desired, serve with whipped cream or MORE cherry pie filling.

Now that I think of it.....wouldn't this be good if you used a Spice cake mix and Apple pie filling?

Update 4/18/12- I was right about the spice cake! Substitute the spice cake mix for the chocolate. Substitute apple pie filling for the cherry. Serve with additional (warmed) apple pie filling and drizzle with caramel sauce. YUM!

Saturday, April 7, 2012

Happy Easter Everyone!

Friday it was sunny! Only 46 degrees, but, it was sunny. I took advantage of the sun and got some garden stuff done. I planted a couple of perennials. A Salmon colored Oriental poppy and a crimson colored Dianthus ( the low-growing, cround cover type). A lot of people believe you should plant on Good Friday. So, I did. I also did a little weeding and pruning in the flower beds. Plus, I found the first spring bloom.


There were several other Crocuses that should be opening soon!
Oh, and I saw my first hummingbird, too! He was so pretty. Green body and violet head. I had a hard time getting a picture of him. My camera is a little slow to get a picture of a hummingbird.


This picture really doesn't do him justice, but, it's what I got. If you want to lure hummingbirds to your feeder, the recipe I use is on this post. Spring is here! I hope everyone has a very Happy Easter!

Friday, April 6, 2012

Windowsill Herb Garden

Still had snow showers yesterday. It's supposed to be sunny by the weekend, though. I've decided a small windowsill garden of herbs would be a nice addition. Fresh herbs are such a fantastic thing to have when cooking and since I LOVE growing things.......Well, that's obvious, right?


I bought this growing tray with growing media. It's long and narrow. It won't take up much space on my windowsill. That's important since I have VERY limited space in my kitchen.


I let the growing media soak up warm water overnight (about 1.5 quarts).


I chose a couple of seed packets of my favorite herbs (I'll add more later).


Gently pressed the seeds BARELY into the growing media.


Put the lid on the growing tray. Placed the tray in a sunny, south window (along with my radish sprouts and green onions). Now, I just keep the soil moistened and wait.

Thursday, April 5, 2012

Two More Blocks for JCCF

I absolutely LOVED making Double Treble Burst Square......I decided to make a couple for JCCF. This is a great stash-busting pattern and allows you to have fun with color. The first I did with shades of blues with a bit of burgundy and taupe.


The second shades of cream, tan and taupe, then into shades of greens.


Such a FUN block to make! Now, though, I need to get back on track. I have more blocks to make for the Sampler Afghan. I still have January's filler square, February's square and 3 squares for April to complete. Plus, this is my BUSY season at work, so I probably won't get near as much crocheting done as I'd like!

Tuesday, April 3, 2012

Radish Sprouts

My radish sprouts were a success! I guess you'd call it a success. They grew. I put them in last nights salad. They have a slightly spicy flavor (like a radish). VERY yummy! There is on thing I will do differently next time though. In the instructions, it said to rinse and turn upside down to drain excess water. The one (tiny) problem......all the roots matted into the cheesecloth lid. Next time, I'll drain the excess water. Then shake seeds back from the cheesecloth. I think this will work. I'll let you know.